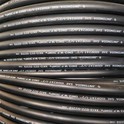
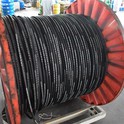
Hey there! As a supplier of low side hoses, I've seen firsthand how important it is to know how to connect a low side hose to a fitting correctly. Whether you're a DIY enthusiast or a professional in the field, getting this connection right can save you a lot of headaches down the road. So, let's dive into the process step by step.
Step 1: Gather Your Tools and Materials
Before you start, make sure you have all the necessary tools and materials. You'll need a low side hose (obviously), a fitting that's compatible with your hose, a hose cutter, a deburring tool, and a crimping tool if required. If you're looking for a reliable low side hose, you might want to check out the Arpico Rubber Hose. It's a great option for many applications.
Step 2: Measure and Cut the Hose
The first thing you need to do is measure the length of the hose you need. Use a tape measure to get an accurate measurement, and then mark the hose with a marker or a piece of tape. Once you've marked the hose, use a hose cutter to cut it at the marked point. Make sure the cut is clean and straight. A jagged cut can cause leaks or other problems later on.
After cutting the hose, use a deburring tool to remove any burrs or rough edges from the cut end of the hose. This will help ensure a smooth connection with the fitting.


Step 3: Prepare the Fitting
Next, you need to prepare the fitting. If the fitting has any threads, make sure they're clean and free of debris. You can use a wire brush or a cloth to clean the threads. If the fitting requires a sealant, apply it to the threads according to the manufacturer's instructions.
Step 4: Insert the Hose into the Fitting
Now it's time to insert the hose into the fitting. Make sure the hose is inserted all the way into the fitting until it reaches the stop. If the fitting has a tapered end, make sure the hose is properly seated on the taper. This will help ensure a tight and secure connection.
Step 5: Crimp the Fitting (if required)
Some fittings require crimping to secure the hose in place. If this is the case, use a crimping tool to crimp the fitting onto the hose. Make sure you use the correct crimping tool for the fitting and hose combination. Using the wrong tool can result in a loose or insecure connection.
If you're in the market for a low pressure hose crimping machine, check out the Low Pressure Hose Crimping Machine. It's a reliable and efficient machine that can help you get the job done right.
Step 6: Check the Connection
Once you've crimped the fitting (if required), it's time to check the connection. Make sure the hose is securely attached to the fitting and that there are no leaks. You can do this by applying pressure to the hose and checking for any signs of leakage. If you notice any leaks, you may need to adjust the fitting or replace the hose.
Step 7: Test the System
After checking the connection, it's a good idea to test the system to make sure everything is working properly. Turn on the system and check for any leaks or other problems. If you notice any issues, you may need to troubleshoot the system and make any necessary repairs.
Tips and Tricks
- Always use the correct tools and materials for the job. Using the wrong tools or materials can result in a poor connection or other problems.
- Make sure the hose and fitting are clean and free of debris before making the connection. This will help ensure a tight and secure connection.
- Follow the manufacturer's instructions when using a crimping tool or applying a sealant. This will help ensure a proper and secure connection.
- If you're not sure how to connect a low side hose to a fitting, consult a professional or refer to the manufacturer's instructions.
Conclusion
Connecting a low side hose to a fitting isn't rocket science, but it does require some attention to detail. By following the steps outlined in this blog post, you can ensure a proper and secure connection that will last for years to come.
If you're in the market for low side hoses or other related products, we're here to help. We offer a wide range of high-quality low side hoses, fittings, and other products at competitive prices. Whether you're a DIY enthusiast or a professional in the field, we have the products and expertise you need to get the job done right.
So, if you're interested in learning more about our products or have any questions, please don't hesitate to contact us. We'd love to hear from you and help you find the right products for your needs.
References
- Manufacturer's instructions for low side hoses and fittings
- Industry standards and best practices for hose connections