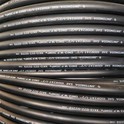
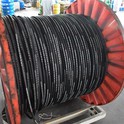
As a trusted supplier of Rubber Hose 1SN, I understand the importance of a proper installation process. A well - installed Rubber Hose 1SN not only ensures optimal performance but also extends the lifespan of the hose, reducing the risk of costly breakdowns and replacements. In this blog, I'll guide you through the step - by - step process of installing Rubber Hose 1SN.
Step 1: Preparation
Before you start the installation, gather all the necessary tools and materials. You'll need a sharp cutter for cutting the hose to the appropriate length, a deburring tool to remove any rough edges after cutting, and wrenches or pliers for tightening the fittings. It's also crucial to have the correct fittings that are compatible with Rubber Hose 1SN. You can find a wide range of these fittings from our product catalog.
Inspect the hose and fittings for any visible damage. Check for cuts, abrasions, or signs of wear on the hose. For the fittings, ensure that the threads are in good condition and there are no cracks. If you notice any damage, replace the damaged parts immediately. Using damaged components can lead to leaks and system failures.
Step 2: Measuring and Cutting the Hose
Measure the required length of the Rubber Hose 1SN carefully. Take into account the distance between the connection points and any bends or curves in the system. It's better to measure twice to avoid any mistakes.
Once you have the correct measurement, use a sharp cutter to cut the hose. Make sure the cut is clean and perpendicular to the axis of the hose. A jagged or angled cut can cause problems when fitting the connectors and may lead to leaks. After cutting, use a deburring tool to remove any burrs or rough edges from the inside and outside of the hose. This will ensure a smooth connection with the fittings.
Step 3: Selecting and Preparing the Fittings
Choose the appropriate fittings for your Rubber Hose 1SN. The fittings should be designed to work with this specific type of hose and should match the size and pressure requirements of your system. There are different types of fittings available, such as crimp fittings, reusable fittings, and push - on fittings.
If you're using crimp fittings, you'll need a crimping machine. First, insert the fitting into the hose until it reaches the recommended depth. Then, place the hose and fitting assembly into the crimping machine and follow the manufacturer's instructions to crimp the fitting onto the hose. Make sure the crimp is uniform and tight to prevent leaks.
For reusable fittings, clean the threads of the fitting and the hose end. Apply a small amount of thread sealant to the fitting threads to ensure a leak - free connection. Then, screw the fitting onto the hose by hand until it's snug, and then use a wrench to tighten it further. Be careful not to over - tighten, as this can damage the hose or the fitting.
Step 4: Installing the Hose Assembly
Before installing the hose assembly into the system, make sure the connection points are clean and free of debris. Remove any old gaskets or seals and replace them with new ones if necessary.


Carefully position the hose assembly between the connection points. Align the fittings with the ports and insert them gently. Use wrenches or pliers to tighten the fittings according to the recommended torque values. Over - tightening can cause damage to the fittings and the hose, while under - tightening can result in leaks.
Step 5: Testing the Installation
After the installation is complete, it's essential to test the system for leaks. Pressurize the system gradually to the normal operating pressure. Check all the connection points, including the fittings and the hose itself, for any signs of leakage. Look for visible drips, wet spots, or hissing sounds, which may indicate a leak.
If you find a leak, shut down the system immediately and relieve the pressure. Check the fitting to see if it's loose or if there's a problem with the seal. Tighten the fitting if necessary or replace the seal. Repeat the testing process until there are no more leaks.
Step 6: Routing and Securing the Hose
Proper routing of the Rubber Hose 1SN is crucial to prevent kinking, abrasion, and excessive stress on the hose. Avoid sharp bends and ensure that the hose has enough flexibility to move with the system without being stretched or compressed.
Use hose clamps or brackets to secure the hose in place. Position the clamps at regular intervals along the hose to prevent it from moving or vibrating. Make sure the clamps are not too tight, as this can damage the hose.
Additional Tips and Considerations
- When working with Rubber Hose 1SN, always follow the manufacturer's instructions and safety guidelines. Different hoses may have specific requirements for installation, handling, and maintenance.
- If you're unsure about any part of the installation process, consult with a professional or contact our technical support team. We're here to help you ensure a successful installation.
- Regularly inspect the installed Rubber Hose 1SN for signs of wear, damage, or aging. Replace the hose if you notice any significant issues to prevent system failures.
In addition to Rubber Hose 1SN, we also offer a wide range of other high - quality hydraulic hoses, such as Rubber Hose 4SP and Rubber Hose EN856. These hoses are designed to meet different application needs and are made from the finest materials to ensure durability and performance.
If you're in the market for Rubber Hose 1SN or any of our other products, we invite you to contact us for a detailed discussion about your requirements. Our experienced sales team can provide you with competitive pricing, technical support, and timely delivery. We're committed to providing the best products and services to our customers. Whether you're a small - scale workshop or a large industrial enterprise, we have the solutions to meet your needs.
References
- Hydraulic Hose Installation Guide, Industry Standard Manual
- Manufacturer's Instructions for Rubber Hose 1SN and Associated Fittings