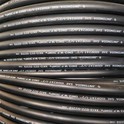
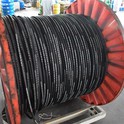
As a trusted supplier of Rubber Hose 2SN, I understand the importance of correct installation to ensure optimal performance and safety. In this blog, I'll share a comprehensive guide on how to install Rubber Hose 2SN correctly, covering every step from preparation to final checks.
Preparation
Before you start the installation process, it's crucial to gather all the necessary tools and materials. Here's a list of what you'll need:


- Rubber Hose 2SN: Make sure you have the right size and length of Rubber Hose 2SN for your application. Check the specifications carefully to ensure compatibility with your system.
- Fittings: Select the appropriate fittings that are compatible with the Rubber Hose 2SN and your equipment. The fittings should be made of high - quality materials to withstand the pressure and environment of your hydraulic system.
- Cutting Tools: A sharp hose cutter is essential for making clean cuts on the Rubber Hose 2SN. Avoid using dull or inappropriate cutting tools, as they can damage the hose and lead to leaks.
- Assembly Tools: Depending on the type of fittings, you may need wrenches, pliers, or other assembly tools to install the fittings onto the hose.
- Cleaning Supplies: Use a clean cloth and a suitable cleaning agent to remove any dirt, debris, or contaminants from the hose and fittings before installation.
Measuring and Cutting the Hose
- Measure Twice, Cut Once: Accurately measure the length of the Rubber Hose 2SN required for your application. Use a measuring tape or a ruler to ensure precise measurements. It's always better to measure twice to avoid cutting the hose too short.
- Mark the Cutting Point: Once you have determined the correct length, use a marker to clearly mark the cutting point on the hose. Make sure the mark is straight and perpendicular to the axis of the hose.
- Cut the Hose: Place the marked hose in the hose cutter and apply even pressure to make a clean cut. The cut should be smooth and free of burrs or rough edges. After cutting, inspect the cut end of the hose to ensure it meets the required standards.
Fitting Installation
- Prepare the Fittings: Before installing the fittings, inspect them for any damage or defects. Make sure the fitting ends are clean and free of any burrs or sharp edges. If necessary, deburr the fitting ends using a file or a deburring tool.
- Lubricate the Fittings (Optional): In some cases, lubricating the fitting ends can make the installation process easier. Use a suitable lubricant recommended by the hose and fitting manufacturer. However, be careful not to use too much lubricant, as it can attract dirt and debris.
- Insert the Hose into the Fittings: Carefully insert the cut end of the Rubber Hose 2SN into the fitting until it reaches the proper depth. Make sure the hose is fully seated in the fitting and that there is no gap between the hose and the fitting.
- Secure the Fittings: Depending on the type of fittings, use the appropriate assembly tools to secure the fittings onto the hose. For crimp - type fittings, use a crimping machine to apply the correct amount of force to create a secure connection. For other types of fittings, use wrenches or pliers to tighten the fittings to the recommended torque specifications.
Installation in the System
- Route the Hose Properly: Plan the route of the Rubber Hose 2SN in the hydraulic system to avoid sharp bends, kinks, or excessive stress on the hose. The hose should be routed in a way that allows for easy inspection and maintenance.
- Avoid Contact with Sharp Objects: Make sure the hose does not come into contact with sharp edges, moving parts, or other objects that could damage the hose. Use hose clamps or supports to keep the hose in place and prevent it from rubbing against other components.
- Connect the Hose to the System: Once the hose is routed correctly, connect it to the appropriate ports or components in the hydraulic system. Make sure the connections are tight and secure to prevent leaks.
- Check for Clearance: After connecting the hose, check for proper clearance between the hose and other components in the system. There should be enough space for the hose to move freely without interfering with other parts.
Pressure Testing and Final Checks
- Pressure Test the System: Before putting the hydraulic system into operation, perform a pressure test to check for leaks. Slowly increase the pressure in the system to the recommended operating pressure and hold it for a few minutes. Inspect the hose and fittings for any signs of leakage, such as drips or bubbles.
- Inspect the Installation: After the pressure test, visually inspect the entire installation to ensure everything is in place and secure. Check the hose for any signs of damage or deformation, and make sure the fittings are properly tightened.
- Final Adjustments: If necessary, make any final adjustments to the hose routing or fitting connections. Ensure that the system is operating smoothly and that there are no abnormal noises or vibrations.
Other Related Products
In addition to Rubber Hose 2SN, we also offer RUBBER Hose SAE R13 and RUBBER Hose SAE R12, which are suitable for a variety of hydraulic applications. These hoses have their own unique features and advantages, and our team can help you choose the right product for your specific needs.
Conclusion
Installing Rubber Hose 2SN correctly is crucial for the performance and safety of your hydraulic system. By following the steps outlined in this guide, you can ensure a proper installation and minimize the risk of leaks and other problems. If you have any questions or need further assistance with the installation of Rubber Hose 2SN or any of our other products, please don't hesitate to contact us. We are here to help you with all your rubber hose needs and look forward to discussing potential procurement opportunities with you.
References
- Hydraulic Hose Installation Guidelines - Industry Standards
- Manufacturer's Instructions for Rubber Hose 2SN and Related Fittings